As a bonus, we will learn to draw those heads even if we don't know how to draw, by using a photo as reference, anyone can do this, you don't have to be an Inkscape wizard.
You may want to use a tablet, but the mouse is enough - the images in this tutorial are made exclusively with the mouse, I chosed to ignore my tablet today as I want to show what is possible using the simplest tools.
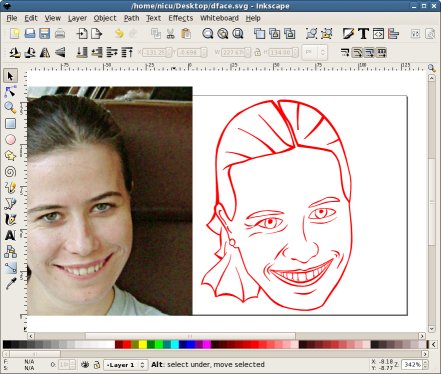
So we will start with a photo and will end with a drawing, like this:

Prepare your workplace
Set the canvas size as you desire, I used here 128x128, as this is an usual size for thumbnails. Import your photo inside the document (drag and drop is just fine) and resize it (with Ctrl pressed to preserve the aspect ratio). By resizing we will lose a lot of small details, but we don't really need them.In the end zoom in. (Alternatively, we can work with the photo at its default size and resize the vector when ready - I prefer to work as the final size because I find this way the preview quicker).
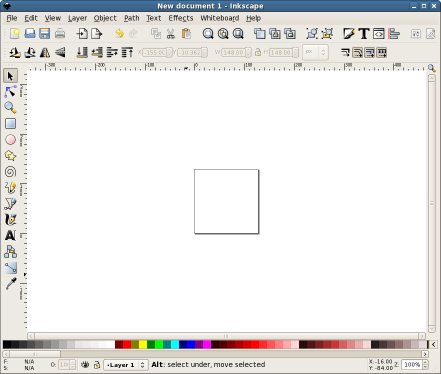
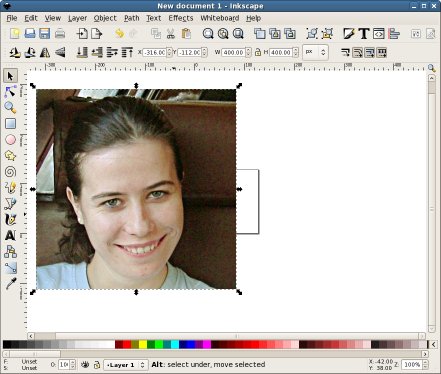
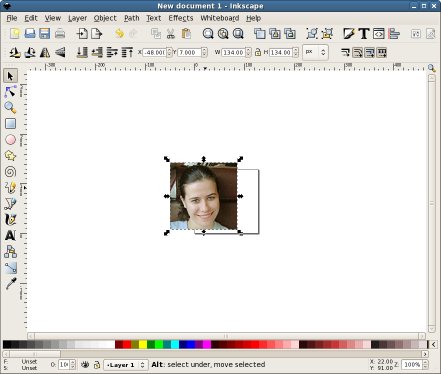
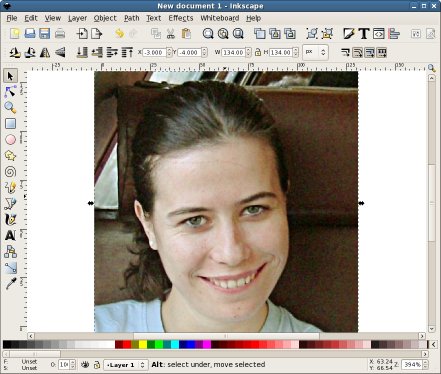
Draw the strokes
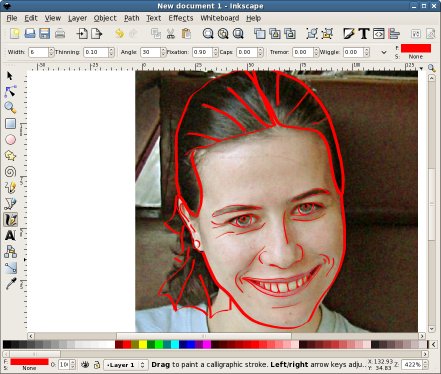
Use the Calligraphic Tool (Ctrl+F6). Set the width and color as you like. I used here Red because is clearer in the tutorial what I do.Start drawing freely along the shapes on your photo. Do not worry about small details, we'll take care of them later.
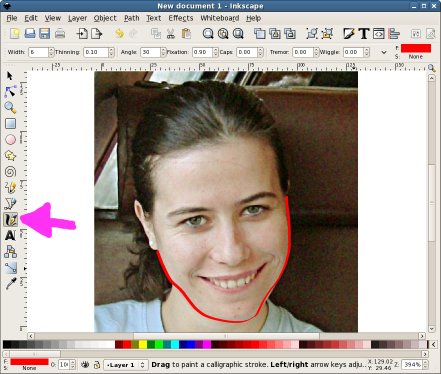
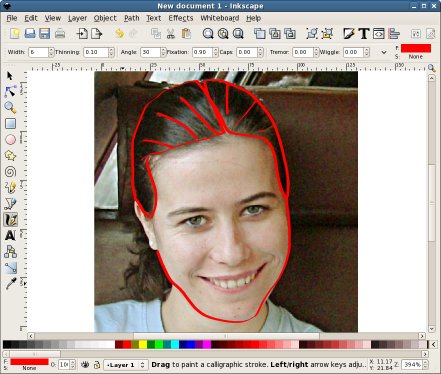
When we want to capture small details and need accuracy, zoom in:
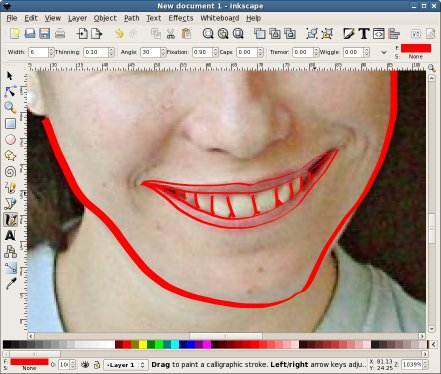
A drawing is not a realistic image, so enhance the things what matters, like the eyes in this case (larger eyes make the subject cuter and more lovable).
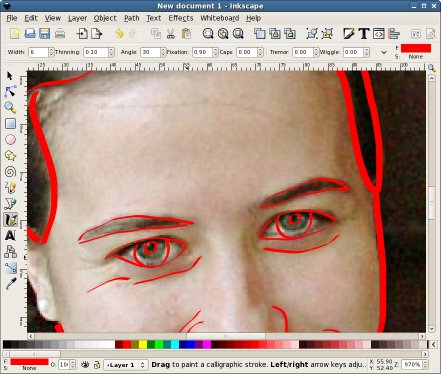
Here we don't want to draw the neck, but it partially cover the hair, so we have to improvise.
Continue until you have covered all the necessary shapes.
Simplify the shapes
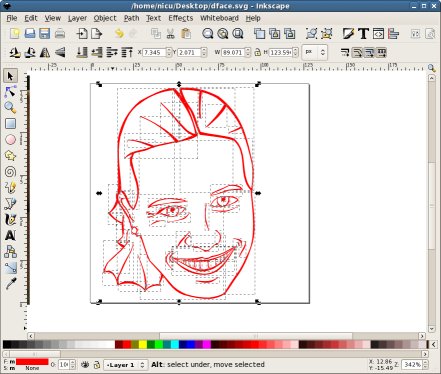
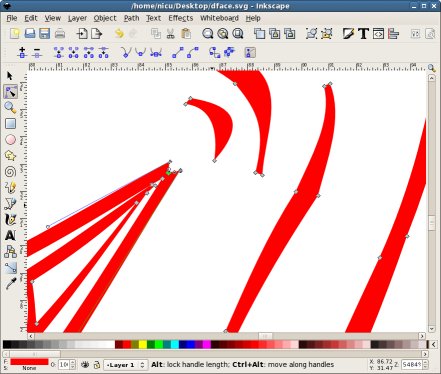
Here comes the most repetitive, laborious and probably boring step: the calligraphic tools generated tons of nodes, so we will delete a lot of them to make the shapes simpler and then adjust the shapes. You can simplify automatically (Ctrl+L) but I don't like its results in this case (I found it useful in other occasions).So select nodes, delete them and after that adjust the shape. Depending on what you want to achieve, make it smooth and constant or very rough and irregular. When one shape is done, proceed to the next.
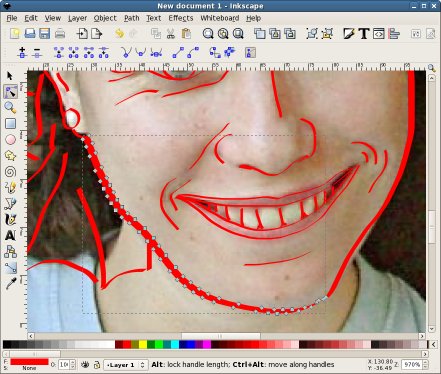
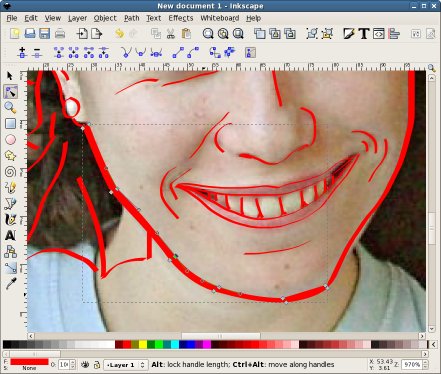
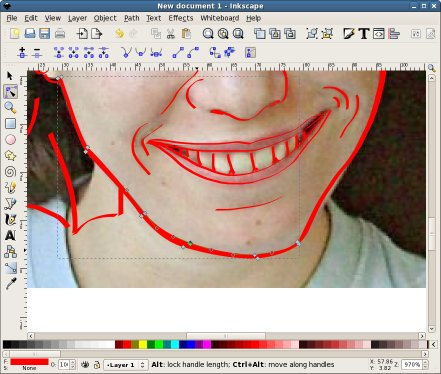
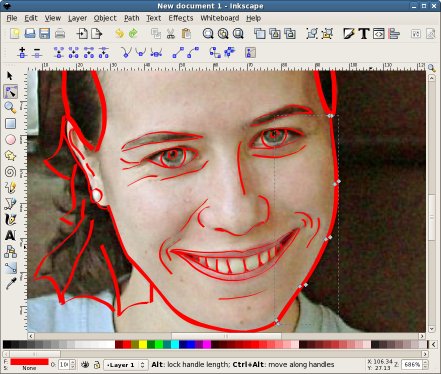
Take care of the details, do not leave parallel edges: wrinkles are thin at their ends and thick in the middle, hair the same.
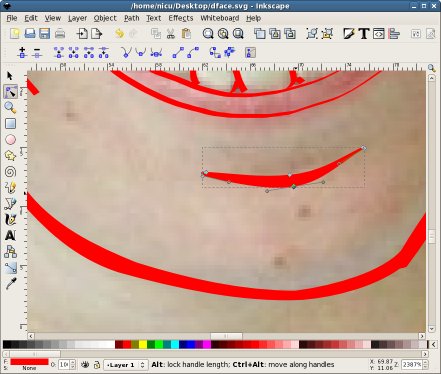
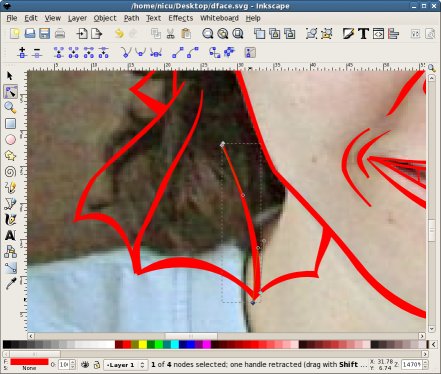
Continue until you simplified and polished all the shapes. It may be a lot of work, but is not high level.
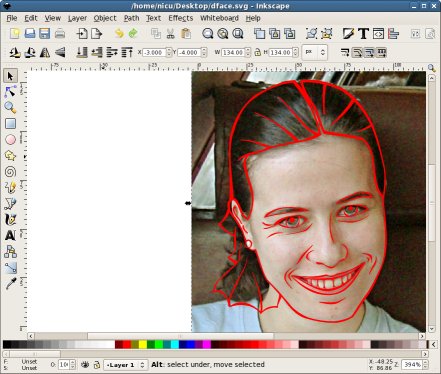
Finish the strokes
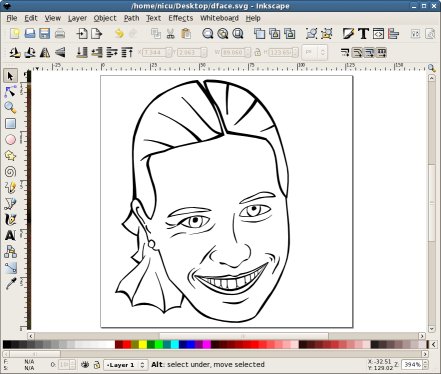
As we are almost ready with the drawing part, move the photo away or even delete it (we may use it in the colorization process, but that is optional).Select all your shapes and do an Union (Ctrl++). You may want to zoom in and simplify more nodes created after union by imperfect positioning, but is not absolutely necessary.
Now you can select the stroke and make it black, as it should be.
Colorization
Use the Bézier Tool (Shift+F6) and draw over. I started with an eyebrow. Unset the stroke and use a fill color as you like (if you kept the reference photo, you can use the color picker to sample from it). Move this color shape under the outline (Page Down) and adjust the nodes if needed (at a zoomed-in level).If you feel the need, temporarily use a very contrasting fill color to clearly see the nodes needing editing.
When an element is ready co to the next.
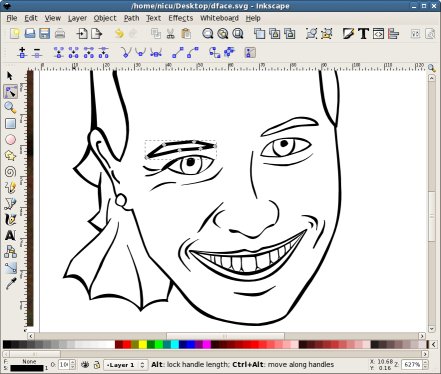
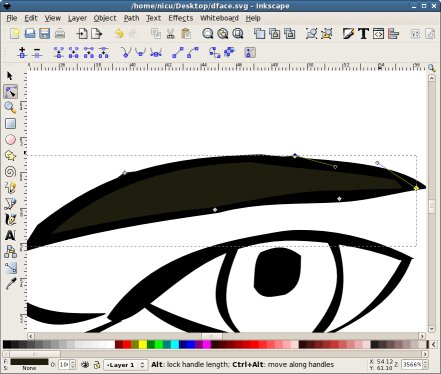
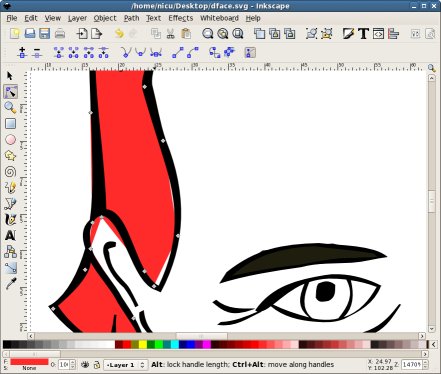
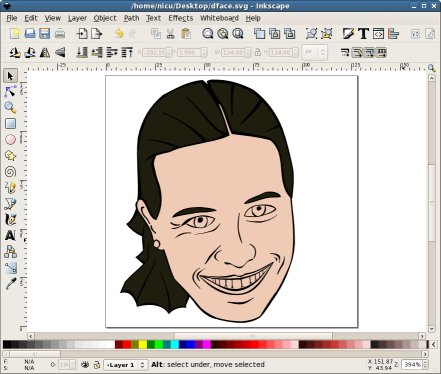
Continue until all areas are colored.
If you like it enough, you may consider it done and stop here or continue by polishing it more (it is still a bit plain, but for small sizes this may be good).
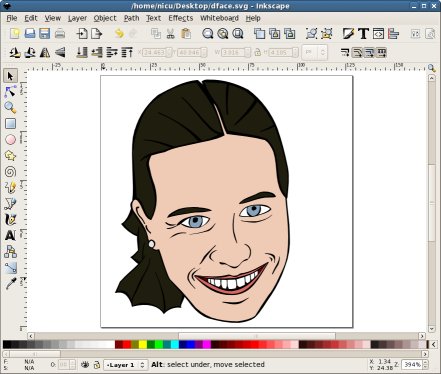
Polishing
We will add now more depth: highlights, shadow, gradients.If you want and still have it handy, put the photo back on to of your drawing and using Freehand Lines (F6) - or Béziers - mark the highlighted and shadowed areas and make them white and respectively black. Or don't use the photo, just your imagination or aesthetic sense.
Remove the photo and adjust the transparency and blur for those areas, we don't need strong white or strong black.
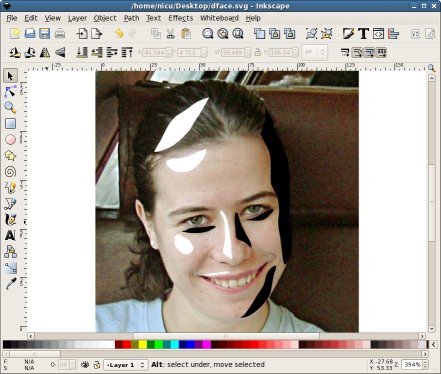
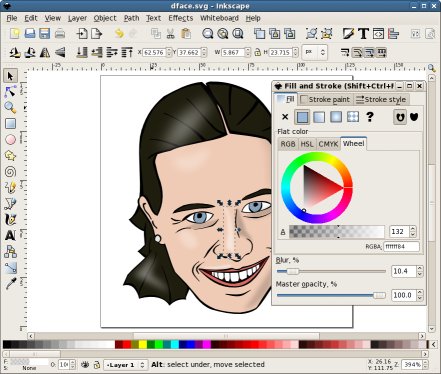
Take special care of the eyes, they must have a glowing area, otherwise the subject will not look alive.
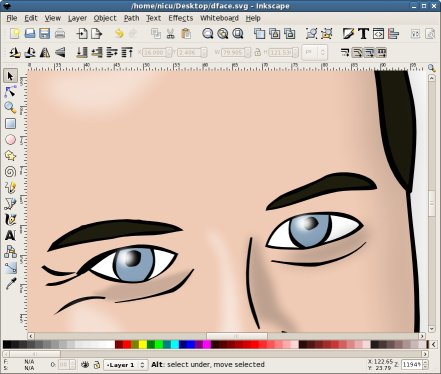
Add as many highlights and shadows as you like and maybe change the solid colors with slight gradients.
As my graphic is a hackergotchi, I added the obligatory drop shadow.
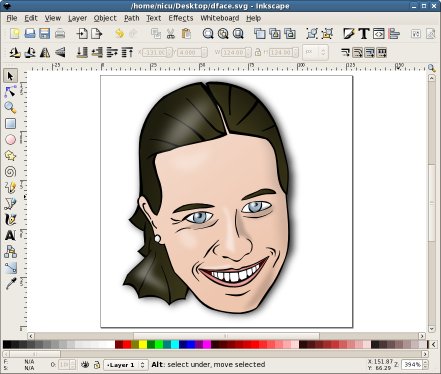
Done!
We are ready, save the SVG, export as PNG and enjoy your work.Brag to your friends about your mad Inkscape skills and don't tell them you used a photo as reference material. Make them bow to you.

In the same way you can do a manual trace from any photo, not only for portraits.
Feedback
You can leave comments, complaints, suggestions, praises on my blog.Update: a
 Romanian translation is also available.
Many thanks to my friends at OpenArt.ro, www.xdrive.ro and Inovatika for motivating me to write this.a disclaimer will appear here soon


 Draw a hackergotchi (or just people heads) with Inkscape
