Short tutorial on creating floating hacker heads to display on blog aggregators like http://planet.fedoraproject.org
Basics
Usually a high quality image is not needed, it will be resized to a small size and a drop shadow will be added, so small defects will not be noticed. A high resolution image is prefered, the processing will be simpler and you will not need a very skilled hand. Select the source image based primarly on how it reflect your personality or attitude, not necessarily on quality.
In this tutorial I will use a poor image made with the crappy camera on my phone, as the focus is on the tools and methods.
Cutting
In the first step, we need to cut the head on contour. Different methods are available: (do not forget to add an alpha channel to the layer, we want deleted regions to become transparent)
1. The Magic Wand
This is most usefull when the background contain large area with uniform colors, highly contrasting with the subject (not the case with the image used in this example). Use "Select contiguous regions" and ajust the treshold as needed.
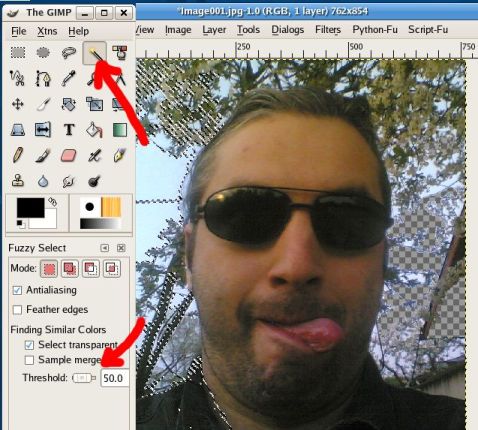
2. Cut on path
Use "Select shapes from image". Eventually work at a high zoom and add short segments. The results are good when the contrast between background and figure is high.
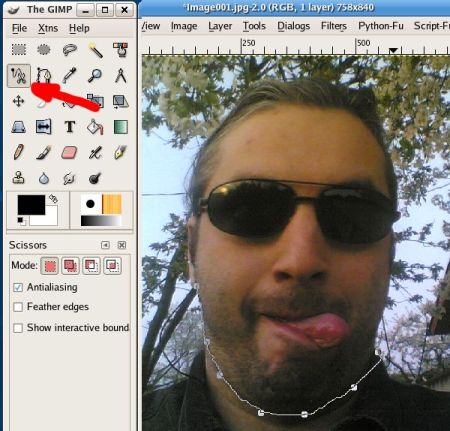
3. Quick Mask
This is a very powerfull tool, it may be overhelming for a simple hackergotchi. Toggle Quick Mask, erase the face, toggle Quick Mask off, invert selection and remove it.
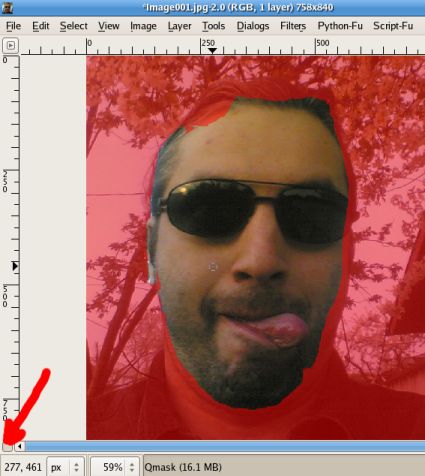
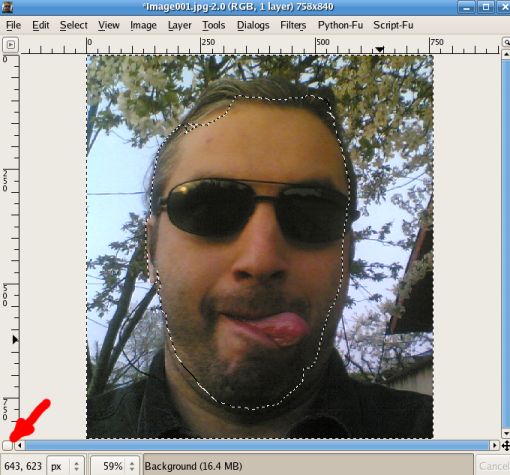
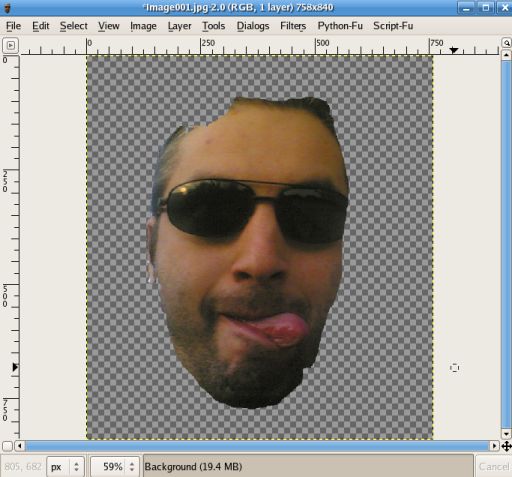
note: i left the selection unifinished on purpose, the scope of this tutorial is to be quick.
4. Erase
This is the tool i use mostly. Select rectangular regions of the background and delete them. Then zoom in and use the eraser on the contour.
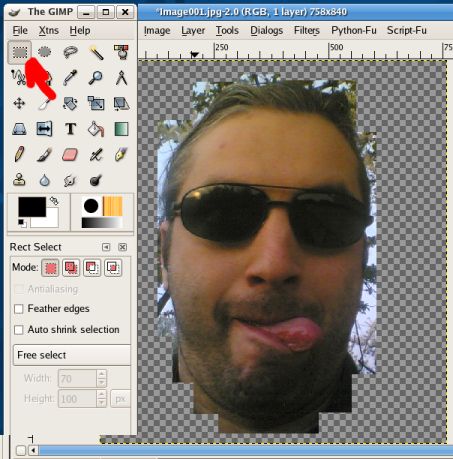
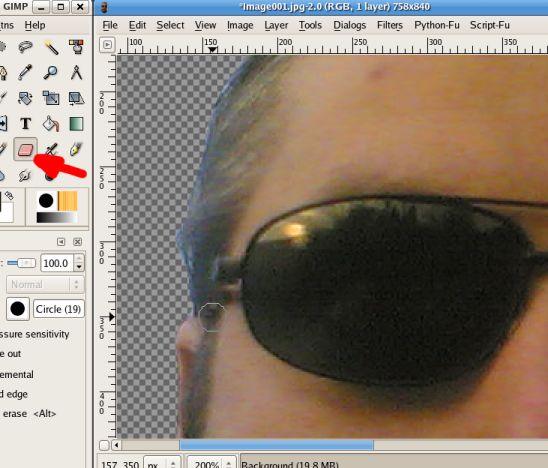
Of course, you can use a combination of the tools described above.
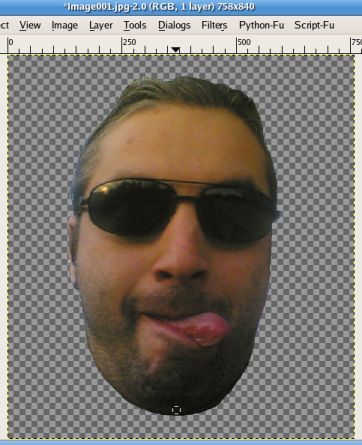
The result should be something like:
Finishing
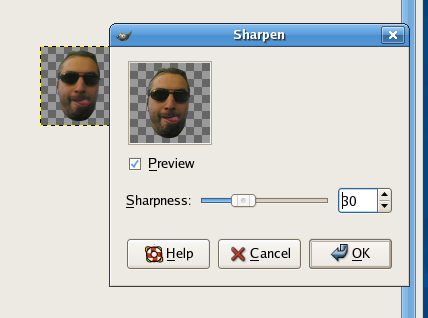
Scale the image down, for Planet Fedora it should be something around 80x80 px. After scaling, the images become blurry, so sharpen it.
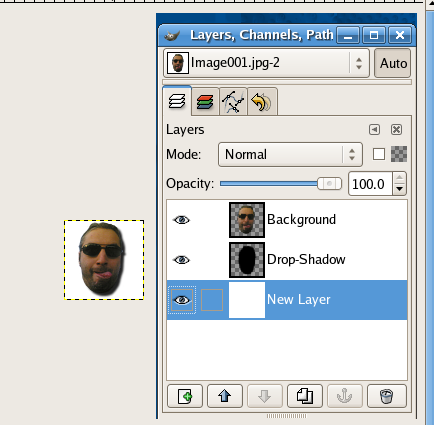
Add a small drop shadow.
note: most beginers are tempted to use the default value proposed by GIMP, do NOT do this, is too large for a hackergotchi, use smaller values. In this case I used X and Y offset of 1 px and a blur radius of 4 px.
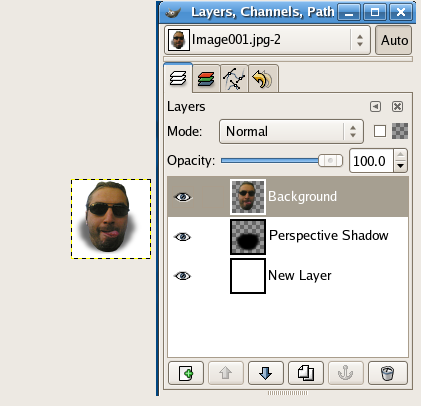
An alternative is to use a perspective shadow (but for consistency with other people on Planet Fedora, a drow shadow is prefered)
End result
In the end, you should have something like this:


SIOX Foreground Extractor
Update: Since I wrote the initial version of this article, GIMP 2.4 introduced the SIOX foreground extractor tool, so you can use it, I wrote a few words about its usage in another article.
Vector drawing
Update: Somewhat related is a tutorial about drawing people faces with Inkscape using a photo as reference.

Closing
If you want something special, do NOT folow my tutorial and allow your imagination to go wild:

Update: a
 Romanian translation is also available.
Many thanks to my friends at OpenArt.ro, www.xdrive.ro and Inovatika for motivating me to write this.This tutorial is free, but if you find it entertaining, pretty please (this is not a requirement, only my humble wish) send an email to dioanad at server gmail.com with thanks for motivating me to publish it and expressing your unhappiness to the same person for destroying my motivation to publish more.
Be nice, polite and do not do nasty things with the address above. Thank you.


 Hackergotchi
