

 Tips for using brushes in Inkscape
This is inspired by Máirín's nice tutorial about Grungy Brushes, published on the Red Hat Magazine. I'll try here something related but not exactly the same: tips about using brushes in Inkscape. A way to create brushes (grungy brushes) is covered in a previous tutorial.
Preparation
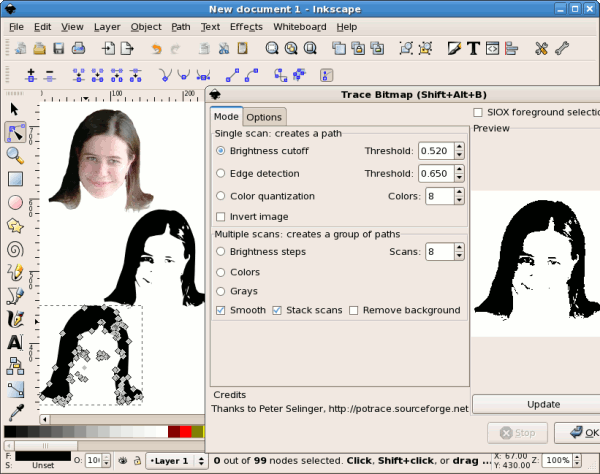
We will quickly create a brush: import a PNG, vectorize it by performing an automatic trace and simplify the resulted path (you can use a brush obtained by whatever way you like, just be aware some of the tips described below work only with a path, not with a group or a special shape).
Stamp
Select your path, drag it freely over the canvas and press the Space key while dragging from time to time when you want to place a stamp.
Alternatively, select the path, press Space and start dragging the path while the key is pressed. Control the density by adjusting the drag speed.
Pattern along Path
This is using an extension included with Inkscape 0.45, in future version its name and location may be changed.
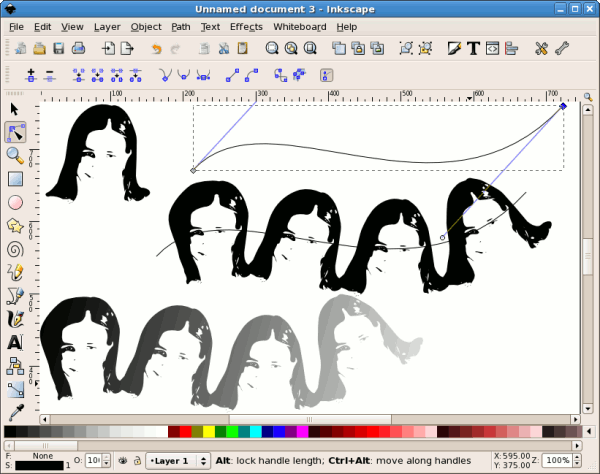
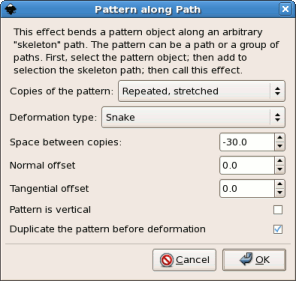
Draw a bézier curve as a guide, modify its shape at will. Select the path stamp (it should be a single path, not a group) and the guide and use Effects > Generate from Path > Pattern along Path. For a nicer effect I colored the result with a simple gradient.
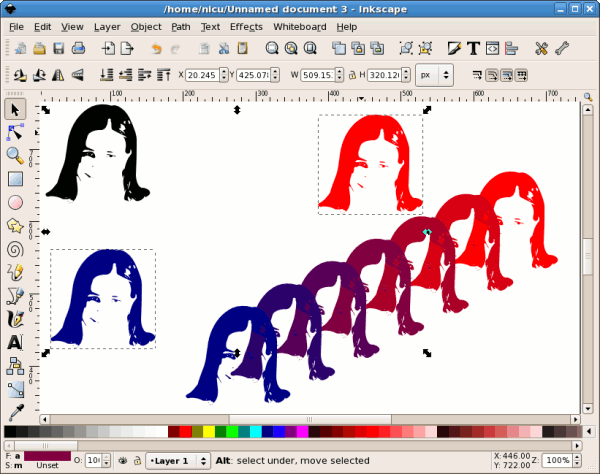
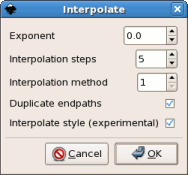
Interpolation
This is using an extension included with Inkscape 0.45, in future version its name and location may be changed.
Create two copies of your path, use different colors if you like. Select both of them and use Effects > Generate from Path > Interpolate. If the start and end paths have different colors, check the "Interpolate style" box.
Cloned Tiles
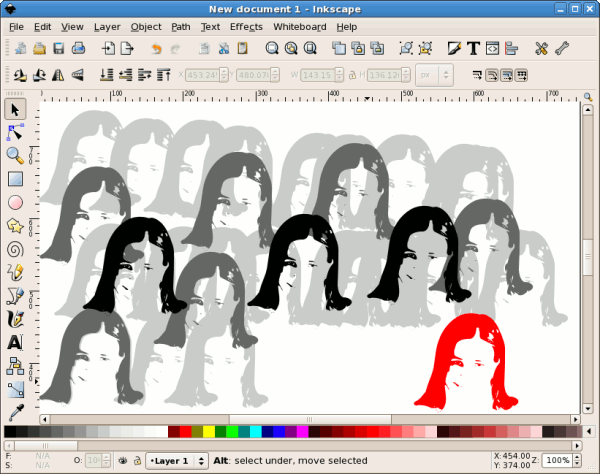
Select the path and use Edit > Clone > Create Tiled Clones. Play with the parameters as you will, in this case I randomized Scale, Rotation and Opacity.
For a "messy" look, use the Unclump button (not illustrated here).

Brushes in a vector graphics application (like Inkscape) are not as powerful as brushes in a raster graphics application (like GIMP) but can be used for some interesting effects. Have fun!
Feedback
You can leave comments, complaints, suggestions, praises on my blog.Update: a
 Romanian translation is also available.
Many thanks to my friends at OpenArt.ro, www.xdrive.ro and Inovatika for motivating me to write this.This tutorial is free, but if you find it entertaining, pretty please (this is not a requirement, only my humble wish) send an email to dioanad at server gmail.com with thanks for motivating me to publish it and expressing your unhappiness to the same person for destroying my motivation to publish more.
Be nice, polite and do not do nasty things with the address above. Thank you.

